Tag: PVAD

  • Making Oracle SQL Developer with external Java JDK work on App-V 5.1

    I recently completed a project to convert App-V 4.6 sequences to App-V 5.1 sequences. One of these sequences was Oracle SQL Developer. During technical testing of Oracle SQL Developer I would receive an error stating:

    Unable to create an instance of the java virtual machine located at path c:\program files\java\jdk1.7.0_55\jre\bin\client\jvm.dll

    At the same time a co-worker had the exact same error at his customer with a converted sequence of Oracle SQL Developer. After a short search on Google I found a blog post that helped me to make the Oracle SQL Developer sequence work on the client. Just remember that not all information might be relevant for your problem, because the co-workers project demanded the  Java JDK 1.7.0_55 to be installed and used by Oracle SQL Developer. The steps to get to a solution might therefor be somewhat different.

    Steps to fix Oracle SQL Developer on App-V 5.1:

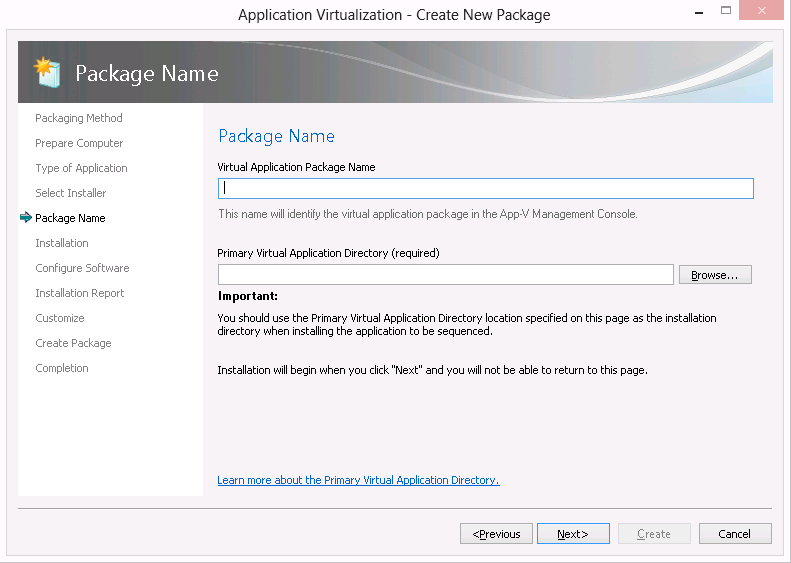
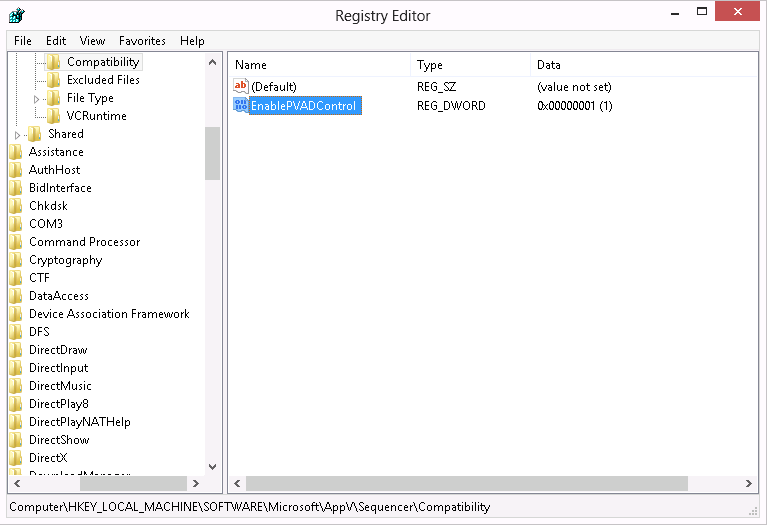
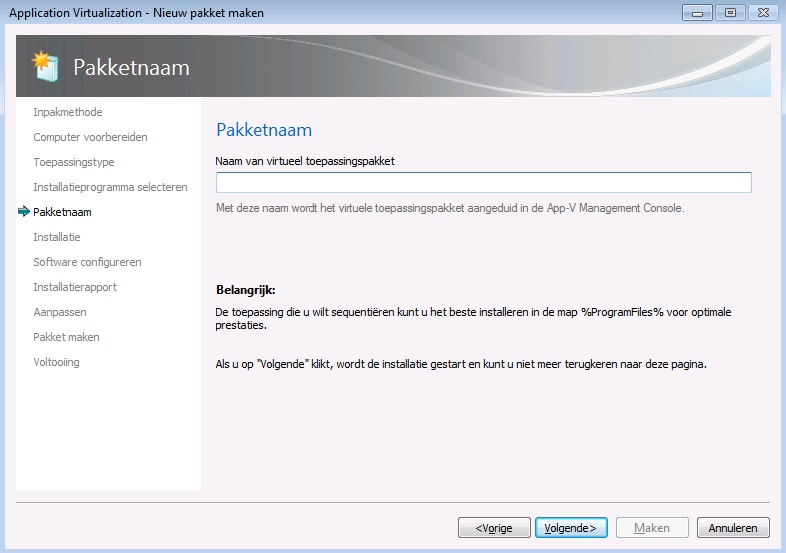
    1. Start the sequencer with the parameter -EnablePVADControl
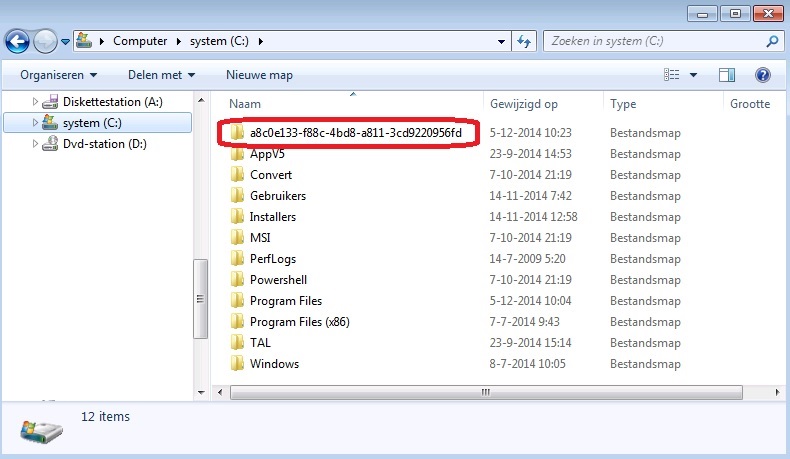
    2. Set the PVAD to C:\sqldeveloper (if you are going to copy the Oracle SQL Developer to that location, otherwise pick the proper location)
    3. Install the Java JDK to a subfolder of C:\sqldeveloper (or the correct location)
    4. Copy the source files for the Oracle SQL Developer to C:\sqldeveloper (or the correct location)
    5. Start the application
    6. Insert Java JDK path (I installed it to C:\sqldeveloper\Java\jdk1.7.0_55)
    7. Depending on your way of sequencing (cleaning %AppData% from the sequence or not) you either have to edit the file %AppData%\sqldeveloper\1.0.0.0.0\product.conf during monitoring or in your user environment tool. Change the line AddVMOption -Xmx800m to AddVMOption -Xmx256m. Be sure to edit the correct line because there is also a AddVMOption –Xms128m line present.
    8. Stop monitoring
    9. Optionally clean the sequence of unwanted files and registry entries
    10. Save the sequence
    11. Test the sequence on the client

    A message about an available update might pop up. I must admit that I haven’t put effort yet in finding out how to disable updates in Oracle SQL Developer.

    A big thanks goes out to Hosam Kamel for his blog post (http://weblogs.asp.net/hosamkamel/resolving-unable-to-create-an-instance-of-the-java-virtual-machine-error) and the reactions on that blog that pointed me to the proper solution.

    I will also let Timothy Mangan know there is one more application to be added to the list of application needing a proper PVAD instead of a dummy. You can find the list of applications needing a PVAD here.


  • Parameter -EnablePVADControl will sometimes not work on a 64-bit machine

    Parameter -EnablePVADControl will sometimes not work on a 64-bit machine

    Bringing back the PVAD debate for one last time.

    Reminder:

    These are the three methods of bringing back the PVAD as discussed in several blog posts and the Microsoft TechNet site. Microsoft should fix this page though as they spell Compatibility right once and then spell it as Compatability in the Note.

    1. Launch the Sequencer from a command prompt and specify: Sequencer.exe -EnablePVADControl

    2. Populate a DWORD value called EnablePVADControl in registry here: HKEY_LOCAL_MACHINE\SOFTWARE\Microsoft\AppV\Sequencer\Compatibility. Setting the value to 1 will enable the PVAD field next time you launch the Sequencer and 0 will turn it back off.

    EnablePVADControl_registry_setting

    3. Use the command line sequencer and specify the -PrimaryVirtualApplicationDirectory argument against New-AppvSequencerPackage.

    Result should be that in the Sequencer you can specify the PVAD again. See below:

    EnablePVADControl_registry

    We just noticed that in AppV 5.0 SP3 the -EnablePVADControl parameter only works on a 32-bit machine. On a 64-bit machine the parameter is not picked up. However the registry setting mentioned earlier is picked up.

    Conclusion:

    If you want the PVAD option back and you are working on a 64-bit machine be sure to use the registry key and not the -EnablePVADControl parameter.

    Update:

    It has been pointed out to me this is not the default behaviour. I have tested this against two 64-bit machines and two 32-bit machines. I will test some more and hope to find the cause why the parameter is sometimes ignored. Conclusion is still valid though as the registry key always works.

  • AppV 5.0 SP3 and the “hidden” PVAD

    AppV 5.0 SP3 and the “hidden” PVAD

    I just downloaded the bits and bytes for the AppV 5.0 SP3 and started to play around with the PVAD that is now “hidden”. This is because a Merged roots principle was introduced.

    First let me take you back to version 4.x of AppV. One thing I didn’t like about AppV 4.6 and using a long file name for the asset folder is the fact that a random short file name was created for the sequence

    Example would be:

    A sequence with the long file name Adobe_Reader_XI_NL_B01 could have a generated short name of F3WJDL8N.X1W (or any other randomly chosen name that contains alpha-numerical characters).

    The chance of two randomly generated short names being identical were almost non-existant but there was a small chance. That last part is what I didn’t like about it. If you used a name within the 8.3 format for the long file name the result would be that the short file name would automatically be the same as the long file name. So that meant more control over possible conflicts or even removing the chance of conflicts.

    In AppV 5.0 SP3 the same principle is re-introduced. The option to declare a PVAD is not available any more. It can be brought back by changing a registry key or starting the sequencer with the -EnablePVADControl parameter. More on this can be found in the write-up of Tim Mangan of AppV 5.0 SP3 which you can find here.

    The screen that you see just before you start monitoring now looks like this (I hope you don’t mind the dutch GUI):

    no_pvad

    In AppV 5.0 SP3 you can only name the sequence and the description now reads that on the AppV Management Server this is the displayed name of the sequence. As you can see by default there is no PVAD option availbale. Also in the bottom part of the screen you get the recommendation to install the application to %ProgramFiles%.

    What the sequencer does next is create a folder with a random GUID as name in the root of C:\. You can see that in the picture below:

    guid_folder

    When installing the application to the default location (usually %ProgramFiles%) all files will be placed in the virtual file system. Now you automatically install to a dummy PVAD by default. It is however still possible to install to the AppVPackageRoot by selecting the automatically created folder as the installation folder. You might need this for a few application that can’t handle being installed to the virtual file system (WinZip is one of those application). Some other examples of these application can also be found in the write-up of TimMangan that I mentioned earlier.

    See below for installing an application (Putty still remains a good test application) to the folder with the randomly generated GUID:

    putty_install_guid_folder

    And the result in the sequencer:

    appvpackageroot

    As you can see you the files still end up in the AppVPackageRoot.

    So AppV 5.0 SP3 uses a “hidden” PVAD which you can still bypass rather easily. It also removes the option to set an UNC path as dummy PVAD which I wrote about here. At least if you don’t use the -EnablePVADControl parameter or the registry change.

  • Don’t use an UNC path as a dummy PVAD in AppV 5.x

    Don’t use an UNC path as a dummy PVAD in AppV 5.x

    From the beta from AppV 5.x onwards I always used a dummy folder as Primary Virtual Application Directory (PVAD from now on). By doing this I always ensured that all files ended up in the virtual file system. I want all files to end up in the virtual file system because only virtual file systems and virtual registries are able to “see” each other when two sequences are connected through an AppV 5.x Connection Group. Since the release of Hotfix 4 for AppV 5.0 SP2 the introduced option to have full write access in the virtual file system is an added reason to always install to a dummy folder as PVAD. Even Microsoft (in the person of Steve Thomas) have changed their stance about a best pratice for installing to the PVAD. Microsoft now recommends not to install to the PVAD. You can read about it here.

    During one of my AppV 5.x Basic classes we were working with a network share to save our sequences to. One of the students decided to skip some steps and used the folder on the network share as the dummy folder to be used as the PVAD. This results in a sequence that will not start on the computer with the AppV client installed. Below I will show the artifacts on the client and the troubleshooting methods used to detect the cause.

    The published shortcut doesn’t have a valid command line:

    empty_shortcut

    This either results in the application not starting (no error) or an AppV error depending on the application that is being virtualized. The student saw strange AppV errors that pointed him in questioning if the proper version of the AppV client was installed. Seeing that I had done the classroom setup and knew for sure that both AppV 5.0 SP2 HF4 Client and Sequencer were installed (I even double checked that before starting the course) we quickly ruled that out as a cause. I reproduced the issue with the application XML Notepad 2007 and that application wouldn’t start. So I went from there.

    Next I checked the AppxManifest.xml file in the C:\Programdata\[PackageID]\[VersionID] folder to see the properties of the published shortcut.

    default_configuration

    The path at appv:Target lists the [{PackageDrive}] token twice. This results in an invalid target path for the published short and therefor no path is shown in the shortcut.

    Next I went to the sequencer to list the parser items just to see where the [{PackageDrive}] token is pointing to. As expected it is pointing to the Q:\ drive used in AppV 4.x. So the shortcut is basically pointing to C:\Program Files (x86)Q:\XML Notepad 2007Q:\XmlNotepad.exe. That doesn’t look right.

    appvpackagedrive

    By now I already suspected a faulty PVAD or something similar. So I went back to the client and checked the FilesystemMetadata.xml file in the C:\Programdata\[PackageID]\[VersionID] folder.

    unc_dummy_pvad_filesystemmetadata_xml

    As you can see the Filesystem Root entry (other notation for PVAD) lists an UNC path instead of a local path. This causes all kinds of paths to be populated by several [{PackageDrive}] tokens and in the process creating invalid paths.

    I did one more check on the sequencer to see more artifacts. I didn’t clean the sequence  so all Windows Installer related files and registry keys were still in the sequence. I browsed to REGISTRY\MACHINE\SOFTWARE\Windows\CurrentVersion\Installer\Folders.

    windows_installer_registry_sequencer


    Even the Windows Installer registry keys are mangled because they contain multiple [{PackageDrive}] tokens. In my opinion the best way to fix this is to re-sequence the application and to use a folder on the local disk as a dummy PVAD

    So my advice is: Don’t use a folder on an UNC path as a dummy PVAD, use a folder on local disk instead.

  • Fixing WinZip MSI error when sequencing with AppV 5.x

    In AppV 5.x I have been sequencing applications pointing the primary virtual application directory (PVAD) to a dummy folder like C:\apps. The primary virtual application directory is the location where the virtual file system (VFS) will be created during sequencing. The reason for using a dummy folder is the inability of AppV connection groups to merge only the VFS when it comes to files. I want to be prepared to use the application in an AppV connection group if necessary.

    When sequencing WinZip 17.5 in AppV 5.0 SP2 beta in this way the following error appears when starting the application:

     WinZip_error

    The solution seems to be very easy to implement. The error “Unable to install over the MSI version of the installation. Please obtain the MSI version or uninstall WinZip first” will not appear when the PVAD points to the initial installation folder of WinZip and Winzip is actually installed to the initial installation folder. Setting your PVAD to C:\Program Files\WinZip and actually installing to C:\Program Files\WinZip will solve this error.